

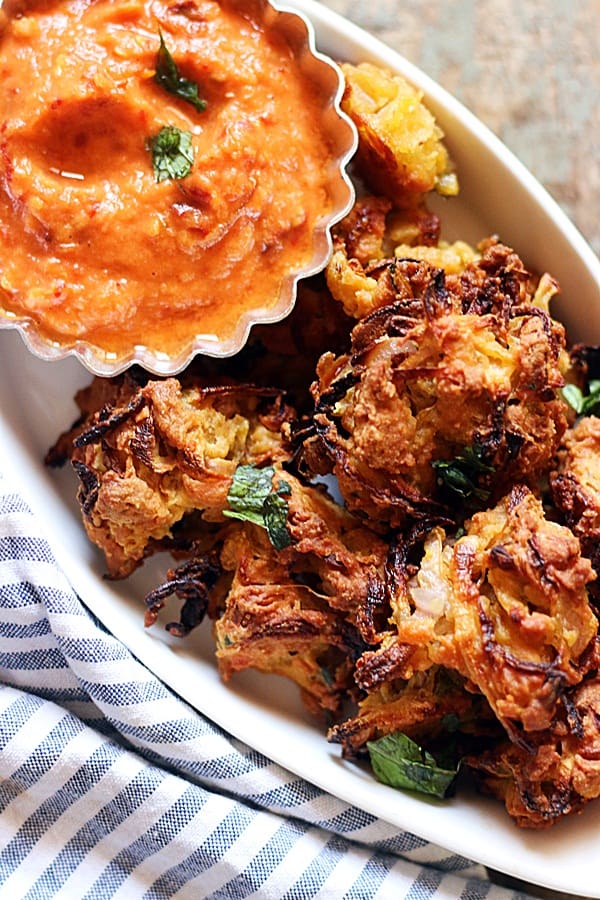
These baked onion pakoda are everything you are looking for in a snack! Crispy, addictive and healthier, these pakodas are the best! Easy to make for a crowd, goes perfectly as starter or snack, vegan & gluten free if you are looking for it and the best part is they taste just like fried ones.
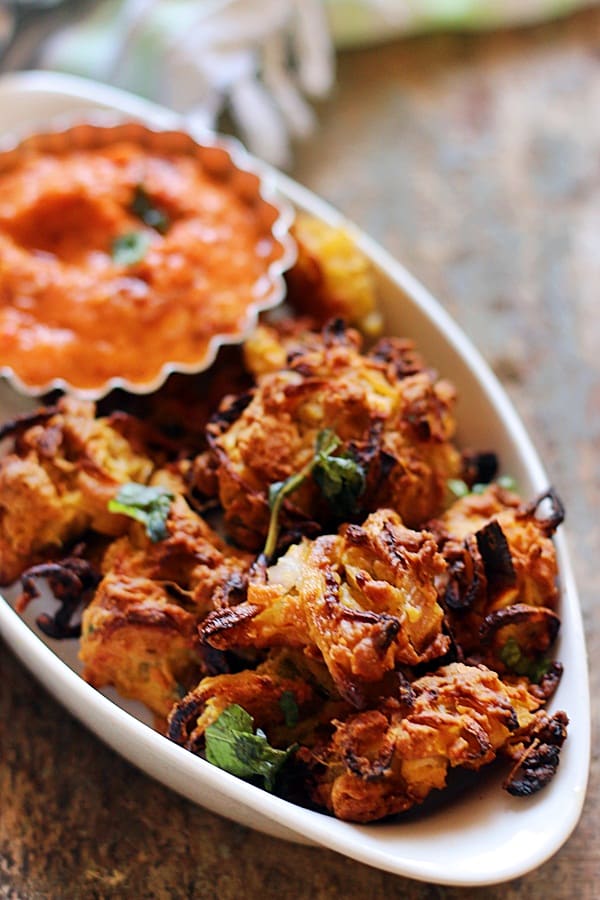
Love pakodas but not the oil? Don’t worry I have these super easy non fried ones for you. These have the same ingredients as your traditional pakora so the taste and flavor is the same.
Apart from not greasy and oily, this is the best way to make pakoda in summer. Yes, no standing in hot kitchen and dealing with hot oil, isn’t that great?
When I say no oil pakora it is not some dry snack with bits of onions here and there 🙂 These are real deal that are so crispy and have that fried effect almost. There are few tips and tricks to get that taste which I have mentioned in the tips section.
I have been roasting veggies, nuts in the oven for quiet sometime. You might like these baked cauliflower bites, beet chips, roasted cashews. Easy and efficient.
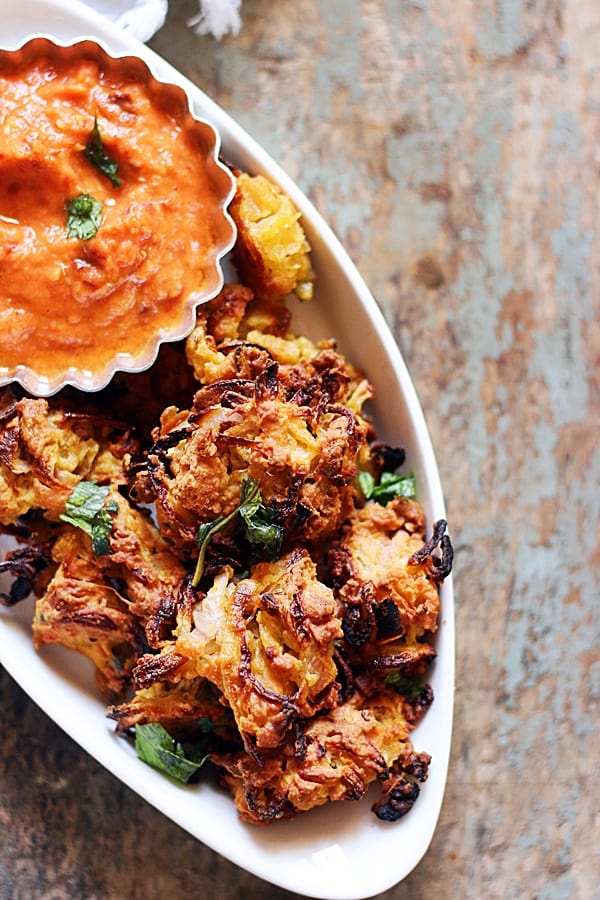
What could be more delicious than a plate of piping hot pakoda with ginger tea or masala tea on a weekend? Do try this easy snack recipe and enjoy!
This Baked Onion Pakoda Recipe Is
Crispy, well cooked and not dried out
Vegan & gluten free
Flavorful, addictive & yummy
Easy to make for a crowd
Step By Step Method
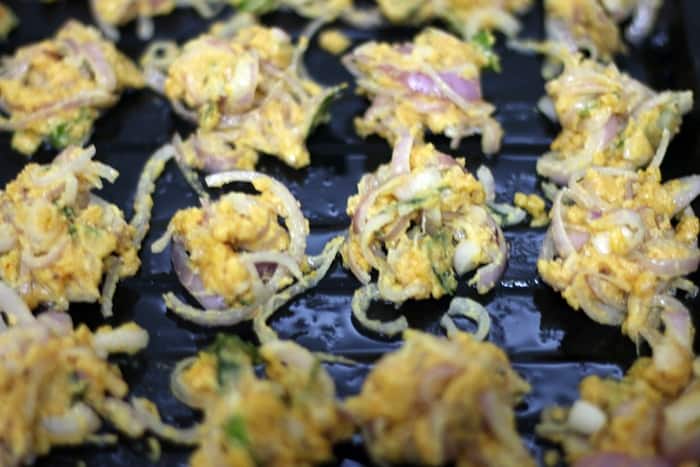
Preheat your oven at 200C or 390F. Grease a baking tray well.
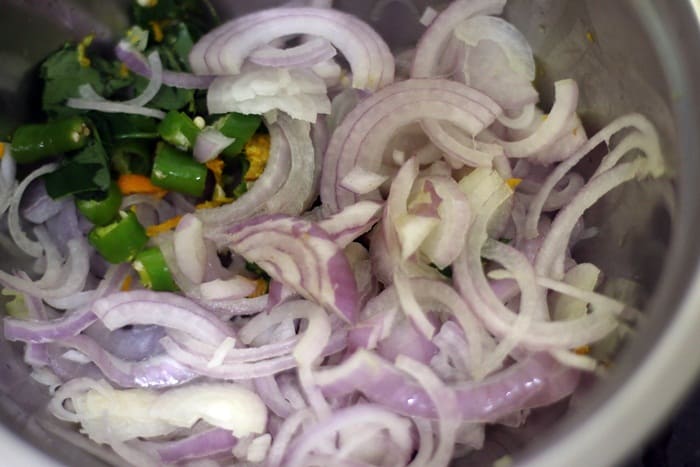
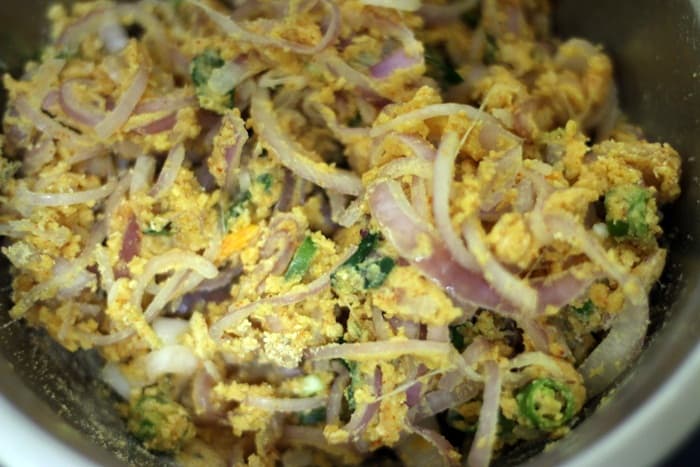
Rinse, wipe and slice onions thinly. You can also separate them into thin rings.

Combine sliced onions, chopped chilies, curry leaves and grated ginger and turmeric in a bowl.
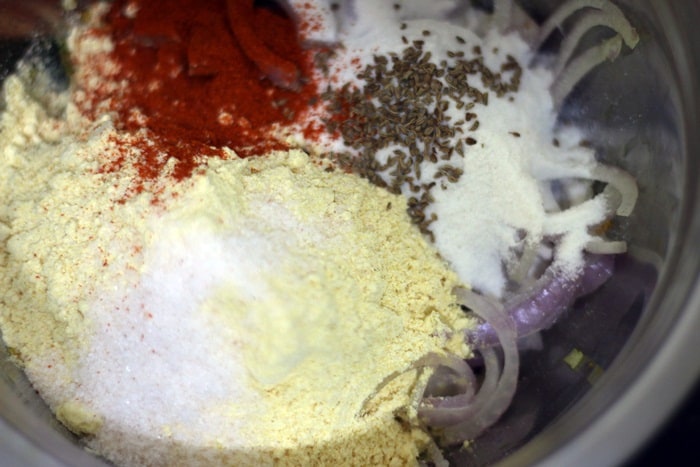
To that add 3/4 cup chickpea flour, 1/4 cup rice flour, 1/2 teaspoon carom seeds, 1 teaspoon red chili powder and salt to taste.
Mix well and add 2-3 tablespoons water to just bring everything together. If you add too much water the onion pakodas will turn soft instead of crispy.
Finally add 2 tablespoons oil and mix very well.
Divide into small portions and place on the greased baking sheet.
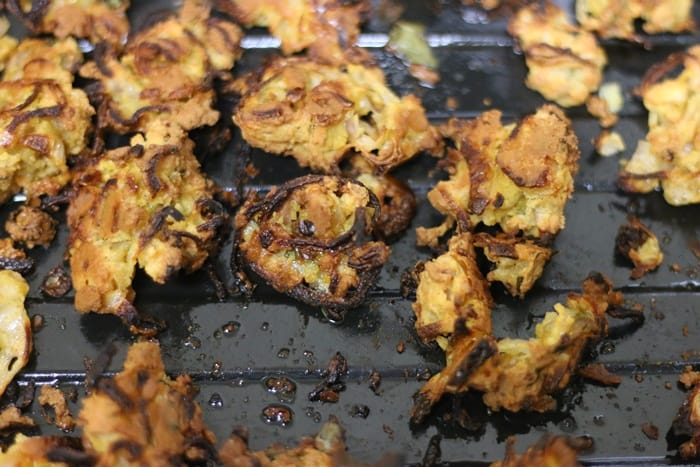
Bake in the hot oven for 15-20 minutes. After 12 minutes, flip each portion and bake till crispy.
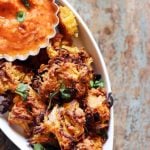
Serve baked onion pakodas immedietly with tea or coffee.
Tips & Suggestions
I have heard few people saying baked onion pakoras can never match the fried ones. That is not completely true. If you prepare the pakora mixture just like how you would for frying, the result will not be as expected.
You will have to follow few points and make the mixture as I have explained here. You will be able to make perfectly crisp, well cooked baked onion pakoda every time.
Always slice onions as thinly as possible for crispy pakoda. This holds good even if you want to fry the pakoda.
For crispy pakoda use as less water as you can to bind the mixture. If you add more water, pakoda will be soft instead of crispy.
Baked Onion Pakodas (Onion Fritters)
1 CUP = 250 ml
Ingredients
- 3 large onions sliced thinly
- 2 green chilies finely chopped
- 12 curry leaves finely chopped
- 1/2 teaspoon grated ginger
- 1/2 teaspoon grated fresh turmeric or turmeric powder
- 1 teaspoon red chili powder
- 1/2 teaspoon carom seeds
- salt to taste
- 2 tablespoons oil
- 2-3 tablespoons water
Instructions
- Preheat your oven at 200C or 390F. Grease a baking tray well.
- Rinse, wipe and slice onions thinly. You can also separate them into thin rings.
- Combine sliced onions, chopped chilies, curry leaves, grated ginger and turmeric in a bowl.
- To that add 3/4 cup chickpea flour, 1/4 cup rice flour, 1/2 teaspoon carom seeds, 1 teaspoon red chili powder and salt to taste.
- Mix well and add 2-3 tablespoons water to just bring everything together. If you add too much water the onion pakodas will turn soft instead of crispy.
- Finally add 2 tablespoons oil and mix very well.
- Divide into small portions and place on the greased baking sheet.
- Bake in the hot oven for 15-20 minutes. After 12 minutes, flip each portion and bake till crispy.
- Serve baked onion pakodas immedietly with tea or coffee.
Lou says
Wow!!! Totally love love love your recipes and the foodagraphic images are just mouth watering 😋😋😋
Lou says
P.s. when will you be making a cook book 👌👌👌🤣🤣