
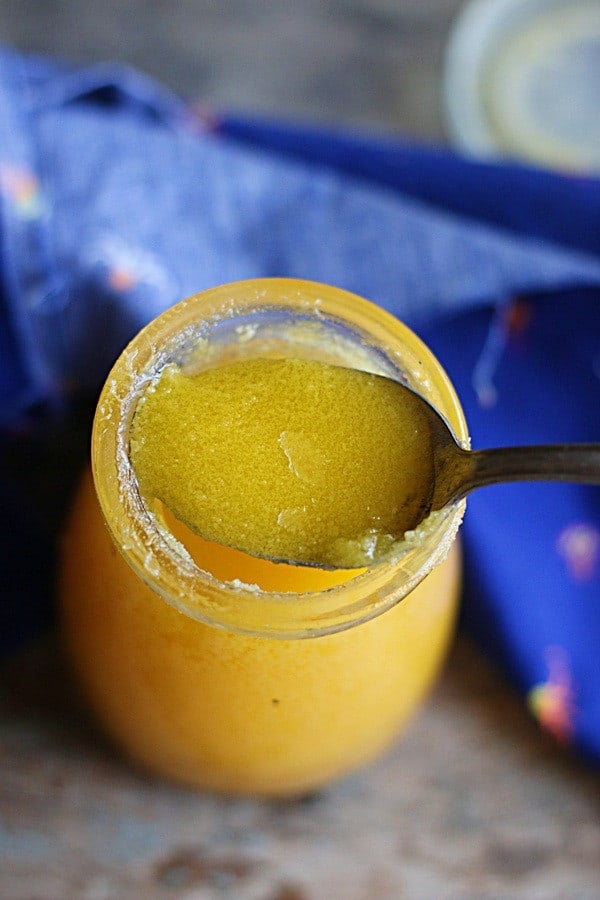
Ghee recipe in 20 minutes- A detailed step by step recipe or guide for making ghee that is tasty and flavorful with perfect texture!
Clarified butter as it is popularly known outside India, such as the United States, it is one the healthiest fats suitable for cooking and baking.
It is age old process that has been followed in every Indian home. Melting the butter and removing the milk solids leaves you with ghee or clarified butter with rich toffee and nutty flavors. It is a ridiculously easy process and here is how to do it.

What Is Ghee?
Clarified butter is butter without dairy and water component, simply pit. Ghee known as clarified butter in many parts of the World is a quintessential ingredient in Indian cooking. You basically make this by removing milk solids from butter by melting it. It is the most preferred cooking fat in India.
Is the staple in Indian cuisine and finds its own in so many other ways too. The origin of ghee dates back to 5000 years and it was first made in India.
Melting butter and storing the butterfat was the clever solution to stop spoiling of butter given to the tropical climate of India. It has come a very long way since and now celebrated as one of the wonderful healthy superfoods all over the world.
It is one of the healthiest fats highly recommend in cooking. Ghee is also a sought after ingredient as medicine in Ayurveda and other holistic healing methods. It has plenty of health benefits, I have listed a few as you read.
In south India it is typically served with every meal with rice, upma, idli, dosa or rotis. We also use clarified butter in seasoning curries, making pulao or biryani.
In recent times ghee is highly recommenced in paleo diet, keto, whole 30 program and many other diets. Ghee us also suitable for people with dairy sensitivities.
This is because melting butter at high temperature removes most of the casein protein or milk proteins and lactose sugar that leads to lactose intolerance.
Ghee made with good quality butter or pure homemade butter is one of the wonderful healing super foods.
Apart from health benefits, it tastes delicious and add so much flavor profile to the food. The shelf life of ghee is high it stays good even for an year when made and stored properly. It is one of the ingredients used very commonly in Indian cooking.
Next it has a high smoke point. While the smoking point of butter is around 320F, the smoking point of ghee is 485 F.
This high smoking point makes ghee most suitable for baking, roasting and frying. Also it is the only fat that you can reheat and reuse again and again unlike any cooking oil.
About This Recipe
Here I am sharing with you all our time tested ghee recipe that we have been following at our home for many decades.
It a super easy recipe that works well with homemade butter and store bought butter too. For this recipe you do not need any special equipment like a thermometer etc.
We will prepare it with ease and check for the doneness just like how grandmother and mother does 🙂
In this guide, I have mentioned all the tips that will help you to choose the right kind of butter, pan etc.
Just follow this recipe to T and I am sure you will have your own jar of best ghee that is perfect in texture, flavor and color.
Now it goes without saying homemade ghee is better than store bought ones in all aspects. It is economical, clean without any fillers and way more flavorful.
So please do yourself a flavor and try out it out, it is one of the nicest things to include in your cooking. 🙂 Ghee is
Pure, clean and fresh
Less than 30 minutes cook time
Vegetarian & gluten free
Economical & unadulterated
Excellent source of goof fat for toddlers and kids.
Which Butter Is Best For Making Ghee?
Butter is the single ingredient to make ghee, so it better be the best 🙂 I would highly recommend organic butter for making ghee. It can be either store bought or homemade.
Ideally, Indian homes used to make their own butter. Full fat milk will be boiled everyday, the cream will be collected in a separate glass jar. This cream will be whipped until butter is separated from whey. The collected cultured butter is melted to ghee.
Over the years, many of them including me have gone to easier means for making ghee. I get absolutely best quality organic butter from grass fed cows to make ghee.
You will need regular unsalted butter for this recipe. If you use salted butter, it becomes very salty once all the water evaporates.
How To Make Ghee
It is a super simple process to make clarified butter ghee at home. It takes hardly 30 minutes depending upon the volume of butter used. If you are using 500 grams or less, it gets ready in 20 minutes.
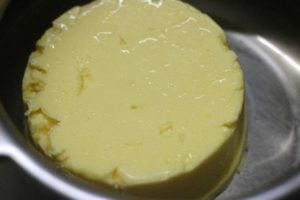
Heat a heavy bottomed pan on stovetop. Place butter in pan and melt the butter.

Now let the butter melt. Maintain low heat or medium heat as the it begins to melt. It will take around 8- 10 for this quantity of butter to melt.
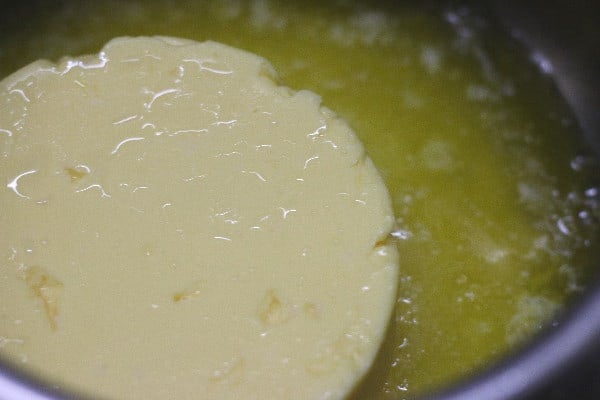
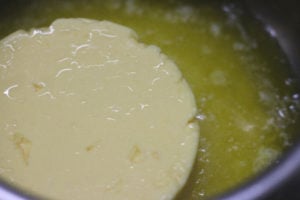
Butter will begin foam up as it melts.
As it melts, it will foam up vigorously on the surface.
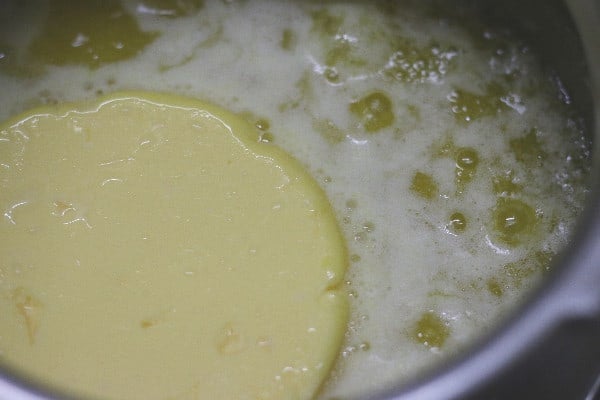
Once the butter has completely melted, it will boil vigorously. This is when the milk solids begin to separate from butter.

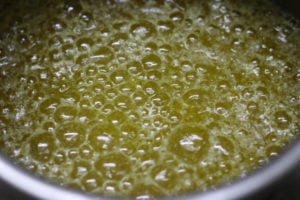
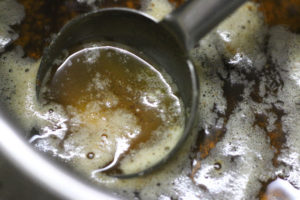
After around 2-3 minutes the crackling sound will stop and the milk solids will first foam up. Maintain medium low heat throughout the process.

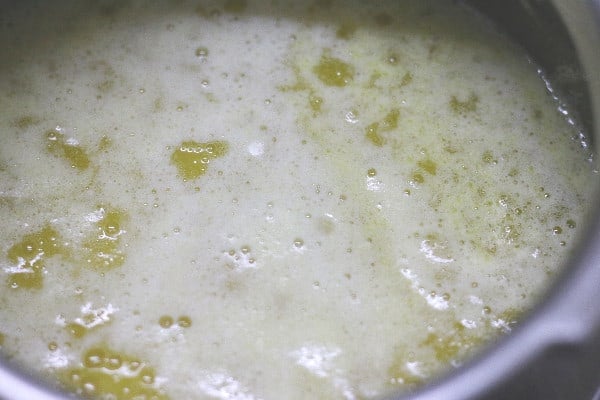
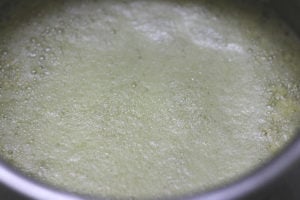
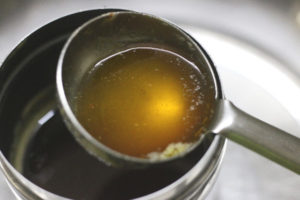
After a minute the milk solids will begin to settle down at the bottom of the pan and you can clear golden brown ghee. Most of the brown butter solids will sink to the bottom.

Let this ghee simmer for a minute to deepen the flavor. At this stage in some recipes, few moringa leaves will be added to enhance butter flavor, we never do that though. After all the milk solids have settled down, remove the pan from flame and let cool for thirty minutes. This will make furthermore settle remaining milk solids at the bottom of the pan.

After thirty minutes, using a cheese cloth or butter muslin cloth or tea strainer or coffee filter strain the ghee into a clean dry glass jar or a glass measuring cup. Now you will see all the brown butter solids or browned milk solids strained and the clear ghee in the jar. You can even use several layers of paper towel for straining.
Do not close the jar tightly until the ghee cools down completely.
Once cooled to room temperature, close the jar air tight and use a clean spoon to use as required. No need to refrigerate. Stays good for 6 months at room temperature itself. It will solidify on cooling and you can reheat as required.

Instant Pot Ghee Or Clarified Butter
If you have an instant pot you can easily make clarified butter in it. While the method is simply melting the butter in saute mode, advantages of making ghee in is
- it gets ready in lesser time
- no mess and beginner friendly.
Here are the steps to make ghee using instant pot. Place the steel insert inside your instant pot and switch it on.
Press saute or normal button, Toggle the switch multiple times to set medium heat. Place the butter inside the pan. You can but the butter into cubes but I don’t that.
Now let the butter begin to melt. Once it begins to melt, set the time to 8 minutes.
Butter will first melt completely and then froth vigorously.
Finally the browned butter solids or milk fats will settle down.
Once the timer beeps let the ghee remain in the same pot for another two minutes. It will continue to brown for another minute or two.
Now you can strain the ghee and store in containers.
Make Ghee Using Heavy Cream
If good quality butter is not available you can make ghee from heavy cream easily. Use good quality preferably organic heavy cream.
From 1 litre or 4.25 cups heavy cream you will get abut 425 grams butter.
Make sure your cream is cold before you start whipping. Place the cream in a deep clean and cold bowl and start whipping it with electric beater or stand mixer.
First cream will whip into stiff peaks and on further whipping, butter will get separated from whey.
Now you can use this butter to make ghee as explained above.
How To Check The Doneness Of Ghee
Once all the butter has melted you can safely remove ghee from flame when
- the liquid turns golden brown under the foam
- all the crackling sound subsides.
How Long Does Homemade Ghee Last?
Ghee keeps well for quiet a long time. In most homes in India ghee is made in large quantity and stored for months.
You can store the whole batch in a big jar and remove the quantity required for a day or two and melt it. This is done to retain freshness.
Typically Ghee lasts for 4-6 months. No need to refrigerate. Store in clean jar in a dry place.
Expert Tips & Notes.
Choose the right pan- the first step is to ensure you have the right pan to melt butter. Butter on melting foams and froth big time. It is important to choose a pan that is deep and wide enough to hold it.
I usually use a pressure cooker base for this recipe. You can also use Dutch oven or heavy stainless pan.
If you choose a smaller pan, the butter on heating will froth all over the stove and trust me you do not want that mess, been there done that 🙂
Cook Till The Crackling Sound Stops- This is the most important tip for this recipe. Wait till the crackling sound stops completely as will ensure that all the milk solids have settled at the bottom of the pan.
Benefits Of Homemade Ghee
The health benefits of ghee or butterfat are a plenty literally. In Indian homes it finds its use in many other ways apart from cooking. Here are few health benefits of ghee that I know.
Higher smoke point- Clarified butter is fairly superior due to its high smoking point compared to butter or any other oil.
High smoking point makes it extremely suitable for roasting, deep frying and baking recipes.
Suitable for Mild Dairy Sensitivity- While melting butter and straining it, you basically remove most of all the milk solids and left with clear healthy fats in the form of ghee. It is considered to be safe for people who are mildly dairy sensitive
Easy to digest- For the same above mentioned reason, ghee is one of the easily digestible fats suitable for kids, people with lactose intolerance too.
Economical- Homemade ghee is super economical compared to store bought ones.
Builds Immunity- Pure ghee is one of the most trusted Indian method to build immunity in children. It is usually mixed with ground turmeric, jaggery and black peppercorns during winter months.
Treats inflammation- The fatty nature (butryic acid) helps in soothing and calming an inflammation.
Treats burns- It is again an age old Indian method to treat burns with ghee just like coconut oil.
Rich in Vitamin E & K- Good source of vitamin e and k, thereby helps in calcium absorption and fights free radicals.
Used for weightless- It is the good fat that will help with quick burning of body fat by improving metabolism.
What Does Ayurveda Says About Ghee
Ayurveda celebrates ghee like no other medicinal form. It says that ghee is the agni- the fuel for digestions and a must in everyone’s diet. It helps in increasing the aura which makes our internal organs soft which turn increases the internal juices if the body (Rasa). It encourages consuming a small amount to increase the body rasa, lubricant of all internal organs.
Ghee also increases shukra or ojas, the one important element fir digestion and also known as the essence of every single tissue in the body.
It forms the base of many ayurvedic medicines like shata dhautha gritham and many more. It is basically a miracle ingredient which is a healer, aids in digestion, salve, helpful in treating burns, moisturizer, body coolant, immunity builder and many more.
Consuming this pure butterfat is one of the easy ways to adopt healthy habits in eating.
How To Use Ghee
Ghee is one unopposed super food in any Indian kitchen. We use it day and every day in many ways. It instant increases the richness of any meal or the dishes to which it is added.
Serve along with meals- This is the most primary use of ghee. Be it north Indian pulka or south Indian rasam rice, it is not complete with that dab of ghee. It simply elevates the flavor and taste of the said dish.
Use in Cooking- If you like you can replace your regular cooking oil and butter in many recipes with ghee. Do the sautéing for biryani and pilaf in clarified butter instead of oil for a wonderful flavor.
In most recipes where melted butter is called for, you can easily use ghee and pleasantly surprised with the flavor.
Deep frying- It is one of the most suited fat for deep frying. You can use it to deep fry all sweets like gulab jamun or even savories like chakli. The flavor is unmatchable.
Moisturizer – One of the best all natural moisturizer, especially great for treating chapped lips. Butterfat is a wonderful moisturizer.
Do make this recipe of ghee today and I am sure you will be a fan in no time 🙂

Recipe Using Ghee
Frequently Asked Questions
You can store ghee in airtight glass jars or steel containers. They stay good for 6 months at room temperature easily. It would even last longer, but I prefer to make small batches and finish off in a month.
You really don’t have to refrigerate ghee. No ones does that here but you can if you really want, no difference.
Depending up on the heat source and temperature of the butter while starting, making ghee takes anywhere between 8-15 minutes.
Yes in a nutshell. Ghee is suitable for lactose intolerant people too as most of dairy component is evaporated. It is loaded with good fat and Vitamin K
Are you making this recipe? I would love to see a snap of your creation too. Do snap a pic and share on Instagram with hashtag #cookclickndevou and please give a star rating ★ in the recipe card above. Follow us on Pinterest , Instagram, Facebook for more recipes and ideas.
Recipe

How To Make Ghee
Equipment
- Heavy pan or Dutch oven
- Ladle
- Strainer lined with cheese cloth or coffee fitter
1 CUP = 250 ml
Ingredients
- 1 pound unsalted butter
Instructions
- Place butter in a thick bottomed big pan and switch on the flame.

- Maintain low or medium flame as the butter begins to melt.
- Butter will begin to melt and foam up.
- After few minutes the butter will boil vigorously and make crackling sound. This happens when the milk solids begin to evaporate.
- At one stage after few minutes the butter will completely foam up.
- At this stage using the ladle see the golden brown ghee below the foam.
- Once the crackling sound completely settles down remove the melted butter from flame. Let cool for 30 minutes.
- Strain the clarified butter or ghee well. You can strain twice if you prefer. Store the ghee in an airtight container.
- Depending on the weather ghee will freeze to solid in a day or two.


Notes
- Always use a thick bottomed big pan. Butter will foam up a lot and it helps to have more space in the pan.
- Always melt in butter in low to medium ow flame. It burns very easily.
- Once the crackling sound subsides remove from flame immediately. This is when the ghee goes from golden brown to burnt state.
- Wait for at least 30 minutes before straining the milk solids.
- You can use the pot for making sambar or any lentils.
- color of the ghee will vary with the quality of butter and the time it is cooked.
- The flavor should be nutty, aromatic with slight toffee like
- The texture should be like sand.
Leave a Reply