
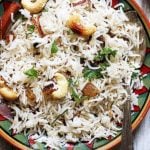
Ghee rice is a delicious, rich and flavorful south Indian rice dish with fragrant rice, ghee or clarified butter and whole spices. It is a vegetarian gluten free recipe. This is popularly known as neychoru recipe in south India. Nei means ghee and choru means rice.
This ghee rice recipe is super easy to make and you need very few ingredients. It has a wonderful subtle yet rich flavor. It is delicately spiced and goes very well as side dish in both Indian and continental meals.
Traditionally this rich rice dish is served with spicy curries and a raita. For more rice recipes please check turmeric rice, curried rice, plain biryani, veg pulao, south Indian coconut rice, restaurant style jeera rice recipes.
Rice is the main and staple food in south India. Apart from serving steamed rice with sambar, rasam or curries there are also many special rice dishes served during special occasions.
This neychoru is one such recipe made with fragrant rice varieties like jeeraga samba or basmati rice. Unlike biryani or pulao, this is a very simple recipe with minimum prep work and easy to make for a crowd.
Here in this post I am sharing my keeper recipe that tastes so good with tips for cooking basmati rice perfectly and other variations. Do try this out and enjoy!
About This Recipe
Ghee rice is a flavorful south Indian rice recipe in the same lines of pilaf but without vegetables. It is a very simple preparation of sautéing whole spices and rice in desi ghee and cook it into fluffy rice dish.
This is very mildly spiced rice so it is best served with spicy robust curries. Usually in restaurants ghee with chicken curry or veg korma is a very popular combination. At home I serve it with a simple potato curry or few other options.
You will find ghee rice in menus of most south Indian restaurants. It is also served in wedding buffets, house parties and in festive menus. You can easily make this for potlucks, sudden guests too.
You can make this dish as simple or as elaborate you like. The one I am sharing here is made with spices, cashews and all but I also make it with just cumin seeds, rice and green chilies on some days. It tastes equally delicious.
If you have leftover rice you can use it too in this recipe. Cooked and cold rice is ideal for this method. This method is especially suitable for beginners.
You can make ghee rice in instant pot, stove top in a pan or pressure cooker. In this post I am sharing instructions for all the methods.
Do try this easy ghee rice recipe with step by step photos and enjoy! This rice is
very delicious
flavorful
rich dish for special occasions
perfect for mopping rich curries
vegetarian, gluten free
mildly spiced, suitable for kids
made with desi ghee.
How To Make Ghee Rice
Preparation.
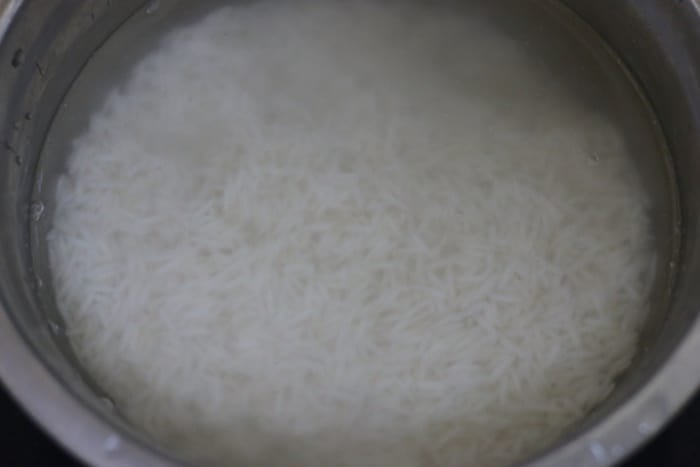
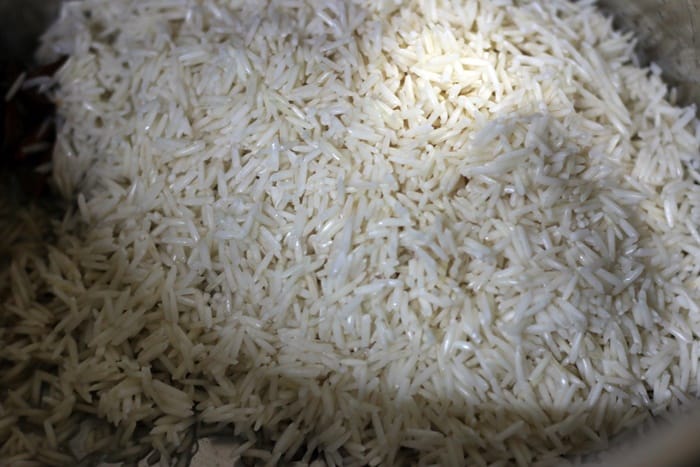
Pick and rinse 1.5 cups basmati rice thoroughly until the starch clears off. Soak the rice in 20 minutes in plenty of water.
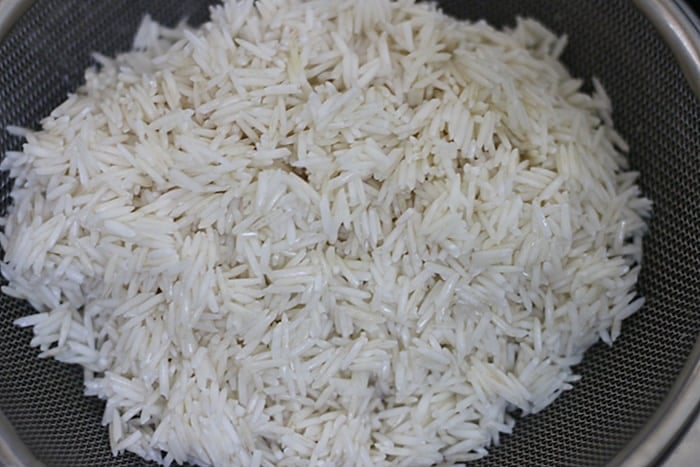
Drain excess water and set the rice aside.
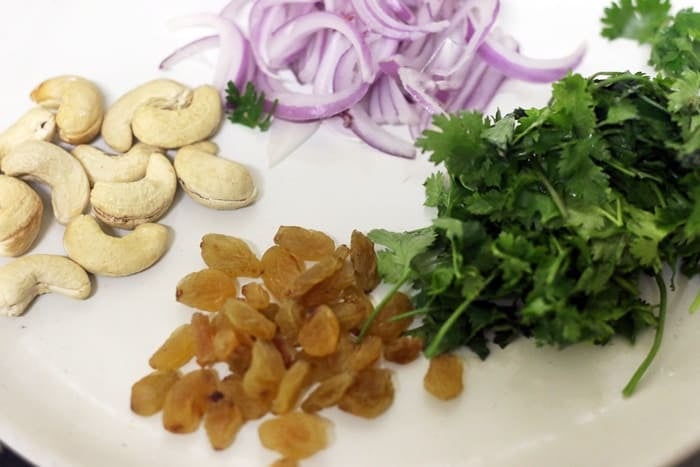
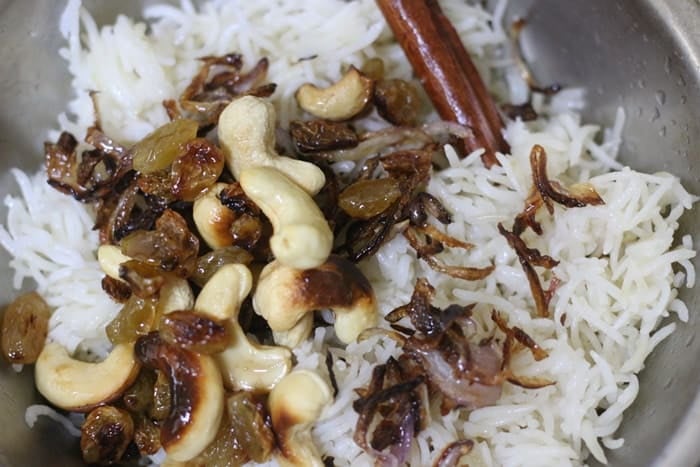
In the meantime slice 1 large onion thinly. Set aside 15 cashew nuts, 2 tablespoons raisins, sliced onions and 1/4 cup chopped coriander leaves.
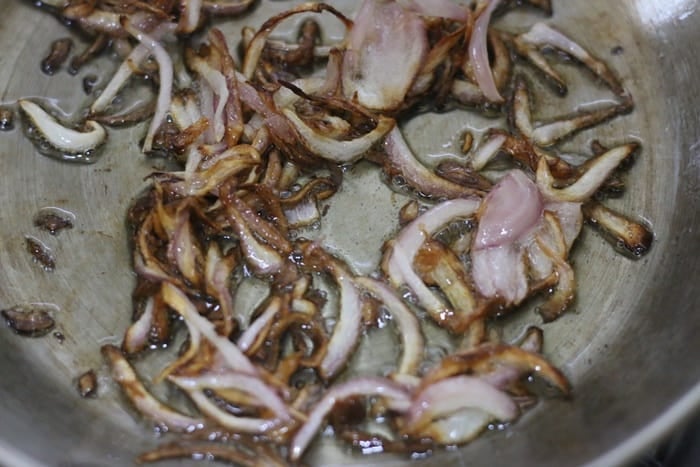
Heat 2 tablespoons oil in a small pan and add the sliced the sliced onions.
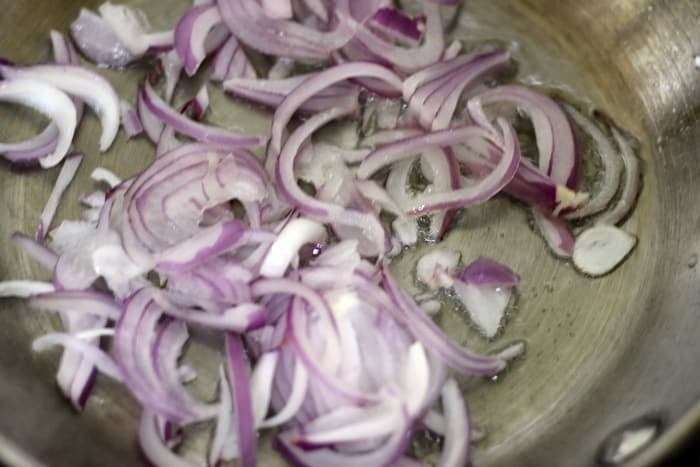
Fry in medium flame until it turns crispy. Drain using a slotted spoon and set aside.
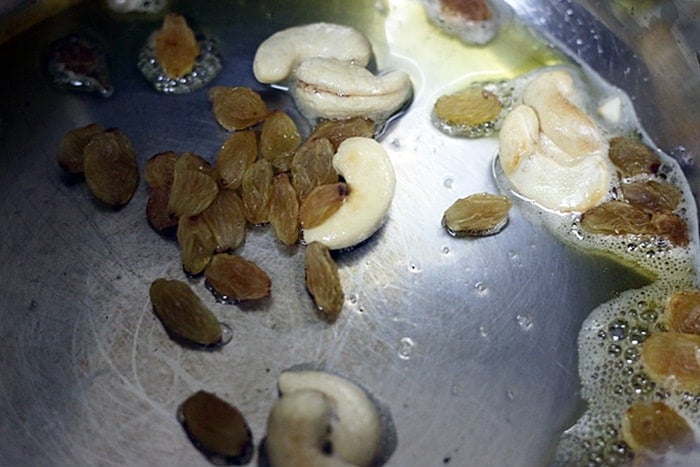
Now heat 3 tablespoons ghee or clarified butter (dairy or vegan) in a heavy pan. Once the ghee is hot add cashews and fry for a minute.

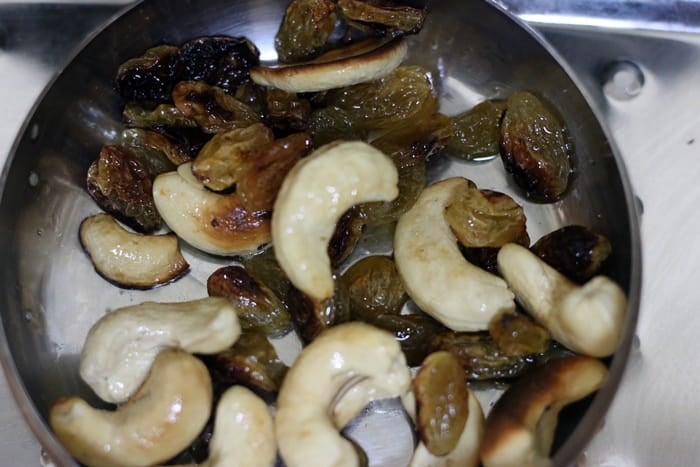
When the cashews start to turn slightly golden add raisins.
Fry for another minute in low flame.
Remove to a plate. Retain the ghee in the pan itself.
Making Ghee Rice Recipe
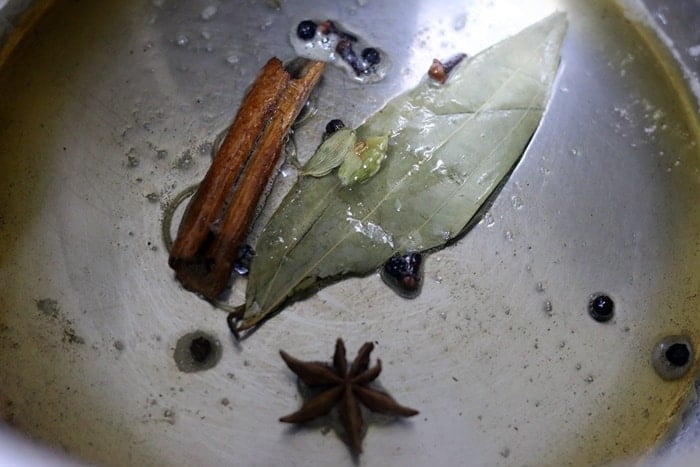
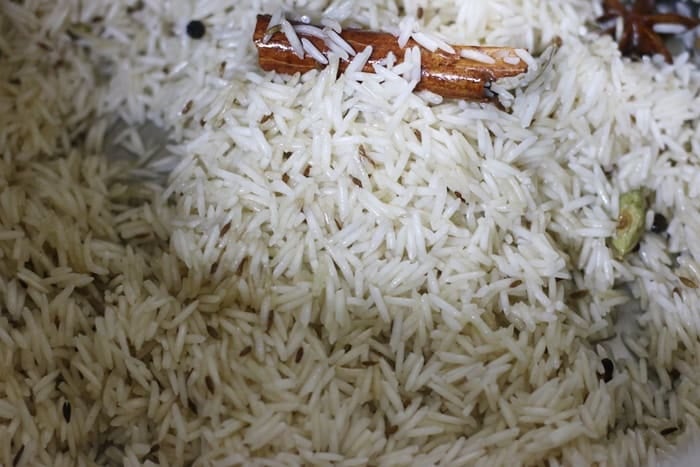
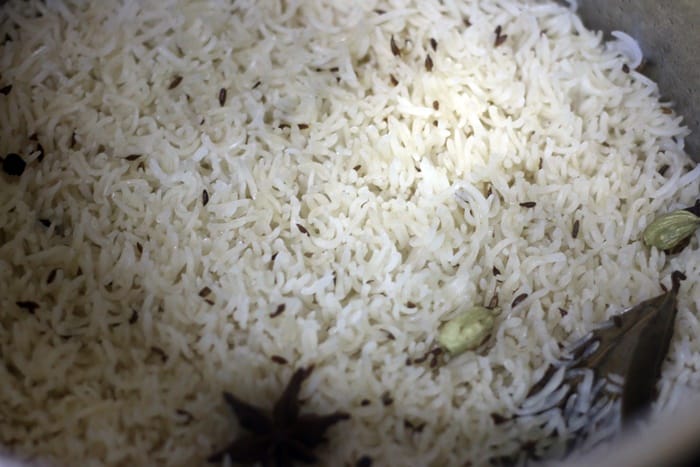
Now to the same pan add the whole spices- 1 bay leaf, 1 star anise, 1 inch cinnamon stick, 2 green cardamoms, 3 cloves, 1/4 teaspoon black peppercorns and 2 strands mace.
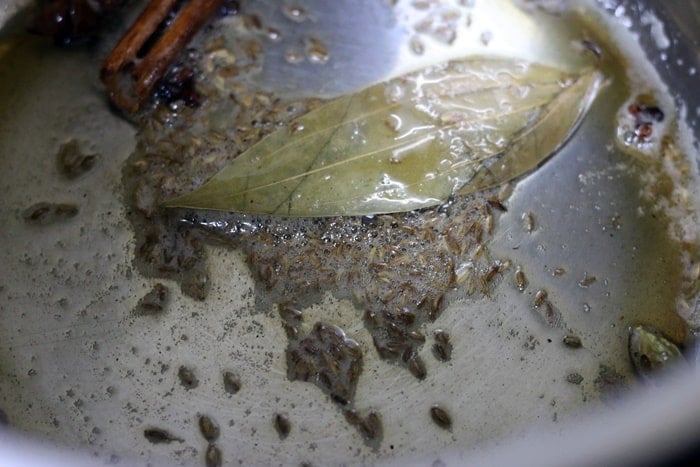
Fry for 30 seconds. Now add 1 teaspoon cumin seeds and fry for few seconds.
Add soaked and drained rice.
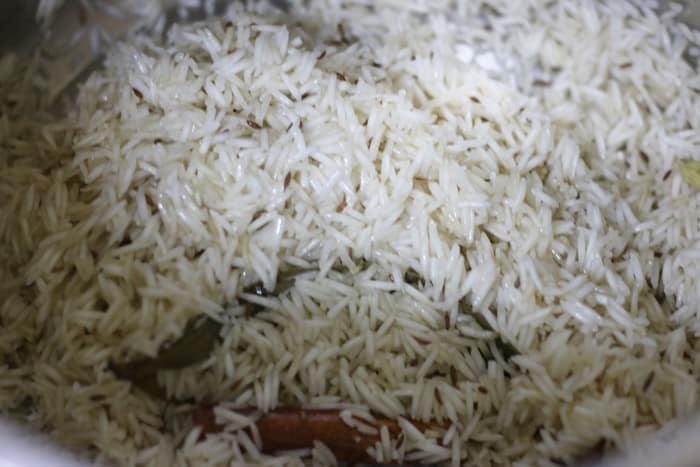
Add 1/2 tablespoon ghee.
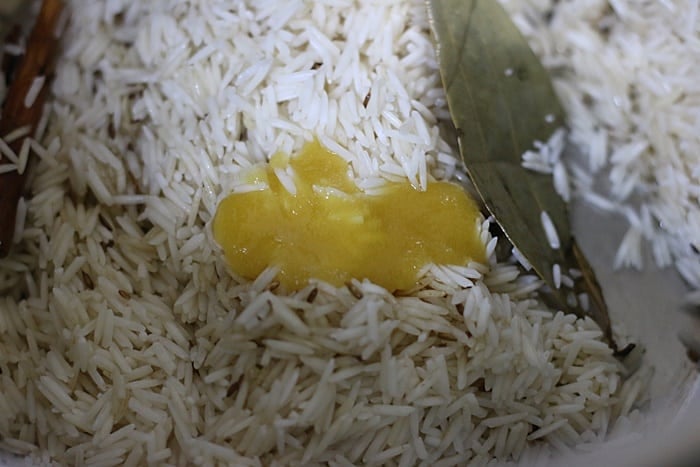
Mix gently and coat the ghee very well in rice.
Saute and toast the rice well in medium heat. It is important to toast the rice really well in ghee for non fluffy ghee rice with rice grains separate.
After toasting the rice, add 2.5 cups of water and salt to taste.
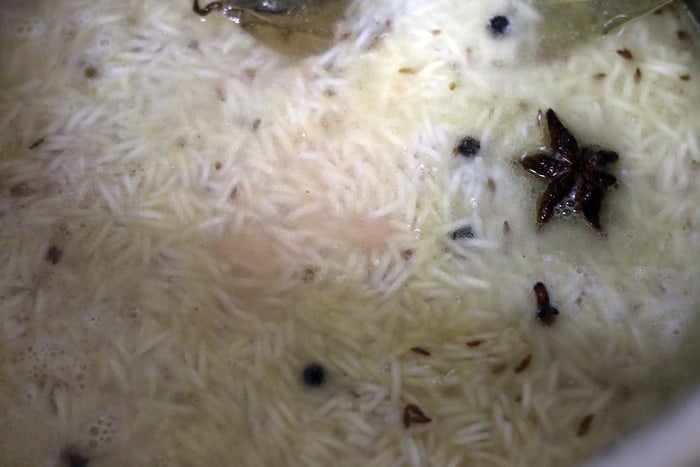
Mix gently. Add 1/2 teaspoon lemon juice.
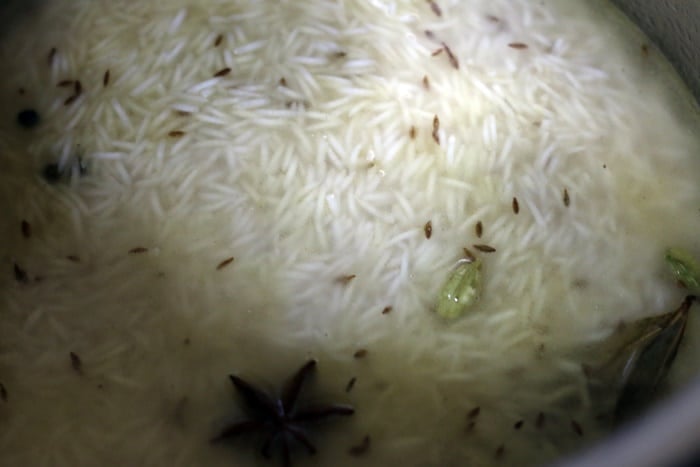
Mix just once and close the pan with a tight lid. Lower the flame and simmer for 8-10 minutes. Do not open the pan or mix while the rice is getting cooked.
After 10 minutes switch off the flame. Let the pan remain undisturbed for another 10 minutes. Now open the pan and gently fluff the rice with a fork or spatula.
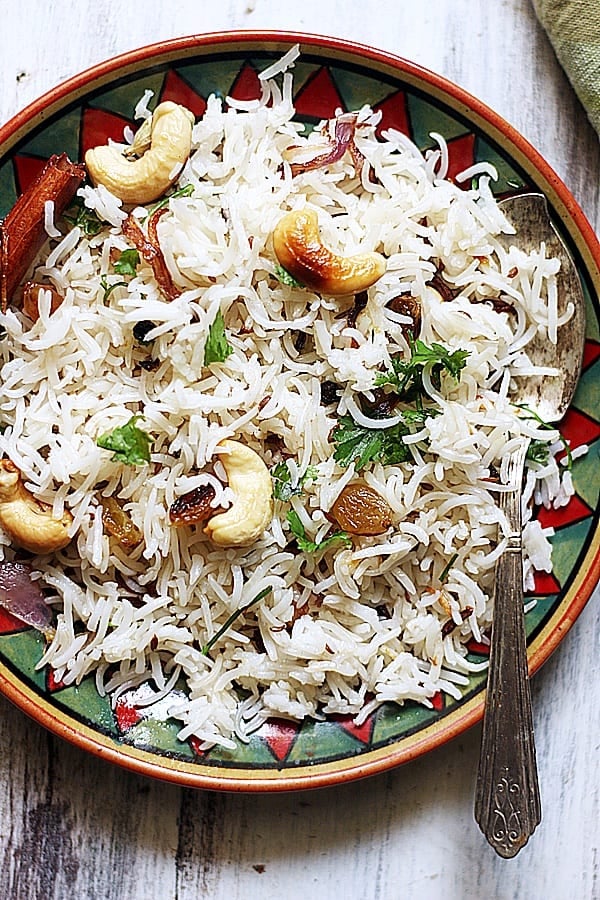
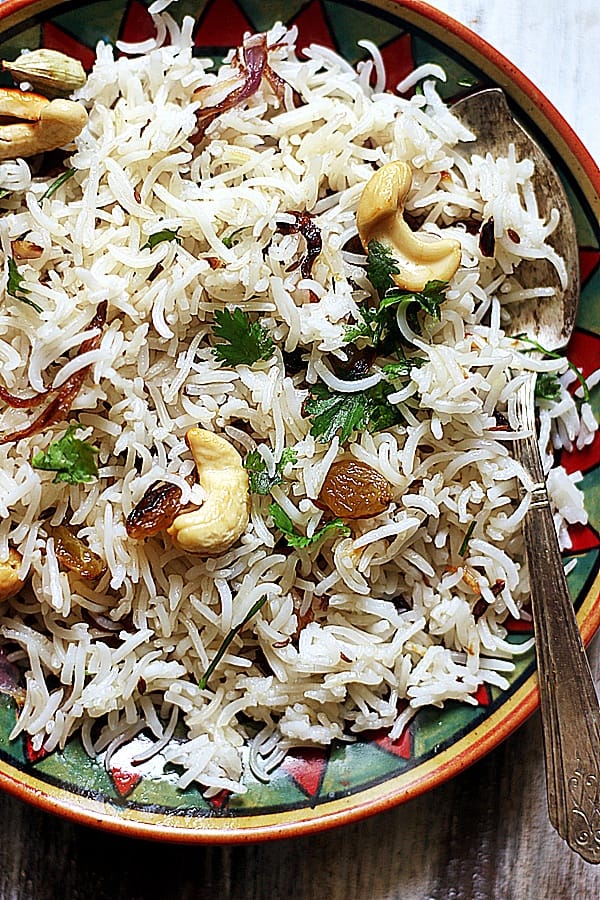
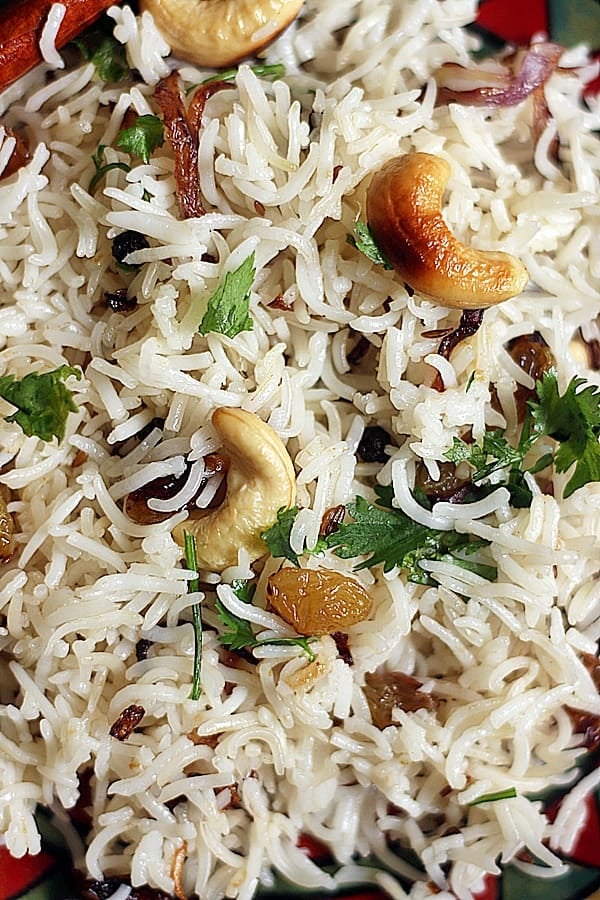
Transfer to serving bowl. Add fried nuts, onions and chopped coriander leaves. Mix gently.
Serve ghee rice warm.
Pressure Cooker & Instant Pot Ghee Rice
Pick, rinse and soak rice as mentioned above. Also fry the onions or you can also use store bought fried onions.
Place the steel insert inside the instant pot and switch in on. Press saute button.
Once it displays hot add 2 tablespoons ghee and fry the cashews and raisins. Remove to a plate.
To the same ghee add the whole spices, cumin seeds and saute for another minute.
Add the soaked and drained rice, more ghee and mix well. Toast for a minute.
Now add 2.25 cups water and salt. Cancel saute. Close the instant pot. Press pressure cooker or manual button. Set timer for 6 minutes. Set pressure valve to seal.
Once timer beeps, let pressure settle on its own for another 10 minutes. After 10 minutes quick release the pressure and open the IP. Fluff up the rice gently. Add fried cashews and raisins, onions and chopped coriander leaves.
Serve ghee rice warm. If you use a pressure cooker cook for 2 whistles in medium flame.
With Cooked Rice
For this method you will need 3 cups of cooked rice from 1.5 cups of raw rice. Follow this fried rice recipe or this how to cook basmati rice post to cook the rice perfectly.
To make ghee rice heat ghee in a pan. Add whole spices and fry for a minute. Next add the nuts and raisins. Fry until it they turn golden. Add sliced onions and fry until they turn golden brown. Finally add the cooked rice and salt to taste. Toss in high flame for 2 minutes. Add 1/2 tablespoons more ghee. Mix well and remove from flame. Add coriander leaves before serving. This is suitable for packing in lunch box too.
Serving Suggestions
Taste & flavor: Ghee rice is very flavorful, rich and has mild heat from black peppercorns. The flavor of whole spices is subtle without overpowering.
Goes well with : You can serve ghee rice with any spicy curry and a raita or plain yogurt. Few side dish combinations we like with this rice are
Tips To Make Ghee Rice
Ghee– Use best quality desi ghee for flavor as well as health benefits in any recipe. I have made this recipe many times with both homemade desi ghee and store-bought vegan ghee. Both tastes good.
If using vegan ghee, use best quality one preferably made with sesame oil fat for best flavor.
Rice– Traditionally in south Indian ghee rice is made with seeraga samba rice which is very flavorful. At home I alternate between it and basmati rice. You can easily use any long grain rice or medium short for this recipe. Just add water cautiously to retain rice grains separate and fluffy. Generally aged rice is best for such rice preparations.
Spices– As we are not using any spice powders or broth in this recipe, it is crucial to use very good quality whole spices. You can go easy on spices that you do not prefer though.
Sometimes I add 1 green cardamom and 1 black cardamom for stronger flavor. Mace lends as very delicate royal flavor so do use it if you have.
This rice is not hot at all as we are adding just 1/4 teaspoon pepper corns. If you want spicier rice you can add 1 or 2 green chili.
Onions are optional in this recipe and you will find many versions without it. We love the caramelized fried onions in this rice. You can skip it to make this rice no onion garlic dish.
For making basmati rice non sticky, it is important to rinse the rice very well until most of the starch is gone and also soak the rice to make it non sticky.
If you want to make this rice more filling you can add pan fried paneer or tofu cubes.
Next to make this as a wholesome you can add finely chopped carrot, beans or shelled green peas too.
The recipe can be doubled, just use a bigger pan,
Frequently Asked Questions
Can I make this rice vegan?
Yes just use vegan ghee or clarified butter. You can also just melt vegan butter.= and use
Can I use oil in this recipe?
The flavor will be entirely different.
How long does basmati rice takes to cook?
From 6- 12 minutes depending on the age of the rice and the cooking medium. Follow the time I have given for each method for best results.
More South Indian Rice Recipes
Are you making this recipe? I would love to see a snap of your creation too. Do snap a pic and share on Instagram with hashtag #cookclickndevou and please give a star rating ★ in the recipe card above. Follow us on Pinterest , Instagram, Facebook for more recipes and ideas.
Recipe
Ghee Rice Recipe (NeyChoru)
1 CUP = 250 ml
Ingredients
- 1.5 cups basmati rice
- 3 tablespoons ghee dairy or vegan clarified butter
- 15 cashews
- 2 tablespoons raisins
- 2.5 cups water for cooking rice
- Salt
- 1/3 cup fried onions
- 1/4 cup coriander leaves
Whole spices for ghee rice
- 1 bay leaf
- 1 teaspoon cumin seeds
- 1/4 teaspoon black peppercorns
- 2 cardamoms
- 2 cloves
- A small cinnamon stick
- 2 strands mace
Instructions
Preparation.
- Pick and rinse 1.5 cups basmati rice thoroughly until the starch clears off. Soak the rice in 20 minutes in plenty of water.
- Drain excess water and set the rice aside.
- In the meantime slice 1 large onion thinly. Set aside 15 cashew nuts, 2 tablespoons raisins, sliced onions and 1/4 cup chopped coriander leaves.
- Heat 2 tablespoons oil in a small pan and add the sliced the sliced onions.
- Fry in medium flame until it turns crispy. Drain using a slotted spoon and set aside.
- Now heat 3 tablespoons ghee or clarified butter (dairy or vegan) in a heavy pan. Once the ghee is hot add cashews and fry for a minute.
- When the cashews start to turn slightly golden add raisins. Fry for another minute in low flame.
- Remove to a plate. Retain the ghee in the pan itself.
Making Ghee Rice Recipe
- Now to the same pan add the whole spices- 1 bay leaf, 1 star anise, 1 inch cinnamon stick, 2 green cardamoms, 3 cloves, 1/4 teaspoon black peppercorns and 2 strands mace.
- Fry for 30 seconds. Now add 1 teaspoon cumin seeds and fry for few seconds.
- Add soaked and drained rice.
- Add 1/2 tablespoon ghee.
- Mix gently and coat the ghee very well in rice.
- After toasting the rice, add 2.5 cups of water and salt to taste.
- Mix gently. Add 1/2 teaspoon lemon juice.
- Mix just once and close the pan with a tight lid. Lower the flame and simmer for 8-10 minutes. Do not open the pan or mix while the rice is getting cooked.After 10 minutes switch off the flame. Let the pan remain undisturbed for another 10 minutes. Now open the pan and gently fluff the rice with a fork or spatula.
- Transfer to serving bowl. Add fried nuts, onions and chopped coriander leaves. Mix gently.
- Serve ghee rice warm.
Ramya says
We made ghee rice following your recipe yesterday and loved it. I added few green chilies along with peppercorns.
Akansha says
Can I use regular raw rice to makeghee rice. please clarify.
shruthi says
Does making ghee rice pressure cooker turns out to be like ones served in weddings?
Manmegalai says
HI Harini, thanks so much for this awesome recipe. I tried ghee rice yesterday and we enjoyed it with chicken gravy. all your recipes are awesome
Harini says
Hi Shruthi. Usually n weddings ghee rice is cooked in big open flame and while making at home here will be a slight flavor difference. I suggest you try this recipe and see if it matches your preference.